Docker Guide for Beginners: Dockerfile, Image and Container
Docker Installation
Before anything else, it is necessary to install Docker on your system. For installation on Mac, Windows, and Ubuntu, you can use Docker’s official guide.
Building an Image
Let’s start by creating our first image in the simplest way possible:
First, create a directory in the terminal using the command mkdir myfirst.
In the next step, create a Dockerfile with touch Dockerfile.
Enter the following commands into the Dockerfile:
FROM busybox
RUN echo "Gee! I'm building my first docker image!"
CMD echo "Peekaboo!"
The first line determines which image to start our work with. Here, I used a lightweight image named busybox from Docker Hub.
The second line runs the echo command with its string content.
In the third line, using the CMD command, we write the default command to start the container, which here is echoing “Hello!”
Finally, in the same directory, execute the build command to create the image from the Dockerfile:
docker build -t yourname/first-image .
As you can see, it is common to use the organizational/image-name structure for the image name. The last dot in the command signifies building using the Dockerfile in the current directory.
What you will see in the terminal is similar to the image below:

Let’s review what occurs at each step during the image build process:
Step 1/3: Pulling Busybox Image
- The latest version of the busybox image is pulled from Docker Hub using the
pullcommand.
Step 2/3: Execution of Echo Command
- The
echocommand is executed within a temporary intermediate container with the ID48204e313b25. - Since this container is not used elsewhere, it is deleted.
- Another layer is added to the image during this step.
- Recall the explained layer structure of images in Docker and its advantages in previous writings.
Step 3/3: Execution of Dockerfile Commands
- The commands in the Dockerfile are executed within another temporary intermediate container with the ID
34de5021f8c6. - Similar to the previous step, since this intermediate container is not used elsewhere, it is deleted.
- Another layer is added to the image.
- Finally, an image with the ID
edca765c109cis created and ready for use.
If you run the command `docker images``, you will see the first image you created in your Docker image list.
To delete an image, you can use the command docker rmi image-name.
Deploy a Container
It’s time to deploy a container from our image!
By executing the command docker run --rm yourname/first-image, you will encounter the output “Peekaboo!”
By running the command docker run image-name, a container is created from the image. If you want to remove the container after exiting or finishing its work, simply add the –rm command.
Remember that you can create hundreds of containers from a single image. Additionally, each command in the Dockerfile adds a layer to your image. Each time you create a container from an image, Docker will use its cache for building if any layers of the image have been previously built, which speeds up the process.
To see a list of existing containers, use the command docker ps.
Now, let’s create a real-world example!
Let’s assume you want to build an application using PHP, running on Nginx, and utilizing MySQL for data storage. In this case, you need several services (containers) to work together. This is where Docker Compose comes in handy. With Docker Compose, you write configurations for services in a YML file and execute them all with a single command.
You can run your application in three steps using Docker Compose:
- Define your application environment in a Dockerfile using its commands.
- Define the services you want to work together in isolation in the docker-compose.yml file.
- Run the command `docker-compose up`` in the terminal and in the root of your project. First, install Docker Compose using the Docker guide. Let’s create a directory step by step.
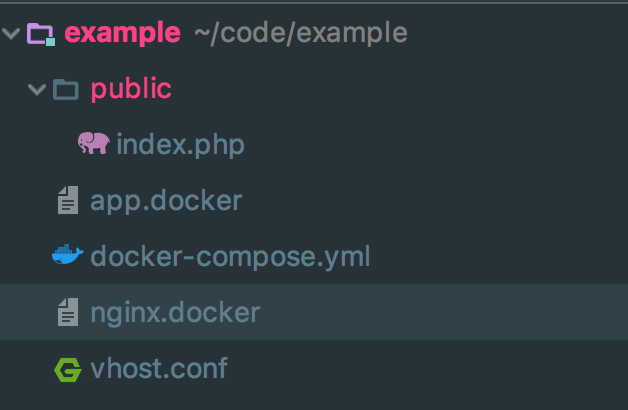
Let’s review each file:
app.docker
This Dockerfile is intended to contain commands related to installing PHP in the project environment.
nginx.docker
In this Dockerfile, we will have commands related to the installation of Nginx and its configuration.
vhost.conf
This file includes the standard Nginx configuration.
docker-compose.yml
This file is responsible for organizing and establishing connections between these three containers in the project environment.
First, let’s explore the contents of app.docker:
FROM php:7-fpm

RUN apt-get update && apt-get install -y libmcrypt-dev mysql-client \
    && pecl install mcrypt-1.0.1 \
    && docker-php-ext-enable mcrypt\
    && docker-php-ext-install pdo_mysql mysqli

WORKDIR /var/www
In line 1, we use the basic php7-fpm image.
From lines 3 to 6, we install the necessary extensions using the RUN command in Docker and Linux commands.
And in line 8, we set the working directory for the project environment.
In the next step, let’s proceed to the contents of vhost.conf.
server {
	listen 80 default_server;
	listen [::]:80 default_server ipv6only=on;

	root /var/www/public;
	index index.php index.html index.htm;

    client_max_body_size 50M;

	location / {
		# First attempt to serve request as file, then
		# as directory, then fall back to displaying a 404.
		try_files $uri $uri/ /index.php?$query_string;
		# Uncomment to enable naxsi on this location
		# include /etc/nginx/naxsi.rules
	}

	location ~ \.php$ {
		try_files $uri =404;
		fastcgi_split_path_info ^(.+\.php)(/.+)$;
		fastcgi_pass app:9000;
		fastcgi_index index.php;
		fastcgi_param SCRIPT_FILENAME $document_root$fastcgi_script_name;
		include fastcgi_params;
	}

	location ~ /\. {
		deny all;
		access_log off;
		log_not_found off;
	}
}
It has straightforward configurations, just the usual settings.
Lines 1 and 2 specify the ports to listen on for IPv4 and IPv6.
Line 5 defines the root path, leading to the public directory in the project.
And in line 6, it specifies the index file.
An important note is in line 21, where fastcgi_pass app:9000 is used for addressing and routing, utilizing the service name app for the IP in the Docker Compose (as you will see in the Docker Compose examination).
Reviewing the nginx.docker file
FROM nginx

ADD ./vhost.conf /etc/nginx/conf.d/default.conf
WORKDIR /var/www
In line 1, we used the basic nginx image from Docker Hub.
In line 3, using the ADD command, we replace the configuration values in the vhost.conf file with the default settings of Nginx in /etc/nginx/conf.d/default.conf.
And now, the docker-compose.yml file:
version: "2"

services:
  nginx:
    build:
      context: ./
      dockerfile: nginx.docker
    volumes:
      - ./:/var/www
    ports:
      - 8012:80
    links:
      - app
  app:
    build:
      context: ./
      dockerfile: app.docker
    volumes:
      - ./:/var/www
    links:
      - mysql
    environment:
      - DB_PORT=3306
      - DB_HOST=database
  mysql:
    image: mysql:5.7
    environment:
      - MYSQL_ROOT_PASSWORD=test
      - MYSQL_DATABASE=sample
    ports:
      - 3310:3306
In line 1, we specify the version of Docker Compose that we are using.
In line 3, we differentiate all containers (services) in this file by assigning them distinct names. Throughout the project, we can use these names for routing and referencing.
In line 4, we enter the specifications for the nginx service.
From line 5 to 7, we define the build commands for the image in the current directory using the corresponding Dockerfile.
In lines 8 and 9, we bind our current directory in the project to the address /var/www in the container (which is our working directory). This ensures that when we make changes to the project code, there is no need to rebuild; changes are applied in the container instantly.
In lines 10 and 11, port 8012 is forwarded to port 80 inside the container.
And in lines 12 and 13, using the specified link, we establish the connections and relationships of this container with other containers.
I believe you are now familiar with the process in Docker Compose.
I would like to add that in the environment section (lines 27 to 29), we set the variables needed by the target image. Usually, Docker documents clearly explain the required variables inside the images.
Here, we provide values for the variables predefined in the MySQL image for naming the database and setting the root user password. I recommend reading the environment section in Docker documents.
The public directory and the index.php file:
Finally, in the public directory, create a file named index.php and populate it with the following content to simultaneously check the connection status to the MySQL database:
<?php

try{
    $dbh = new pdo( 'mysql:host=mysql:3306;dbname=sample',
        'root',
        'test',
        [PDO::ATTR_ERRMODE => PDO::ERRMODE_EXCEPTION]);
    die(json_encode(['outcome' => true]));
}
catch(PDOException $ex){
    die(json_encode([
        'outcome' => false,
        'message' => 'Unable to connect'])
    );
}
As seen in line 4, instead of an IP address, the service name “mysql” is used for routing.
That’s it!
Now, run the command docker-compose up -d in the terminal within the “example” directory, and Tadaaa!
After a successful build, simply enter the address http://localhost:8012 in your browser to see the results. If the output is true, everything has been built correctly, and the containers are accessible.
Finally, to enter the services interactively, use the command docker-compose exec service_name bash and enter the interactive terminal. Start by entering the “app” or “nginx” service. (Thanks to my good friend Erfan for correcting this section)
I recommend you, after playing around with the Docker trilogy, jump into Docker’s official documentation. This way, you can fine-tune your skills with the tool to better suit your specific requirements. :)